REMOVAL AND INSTALLATION
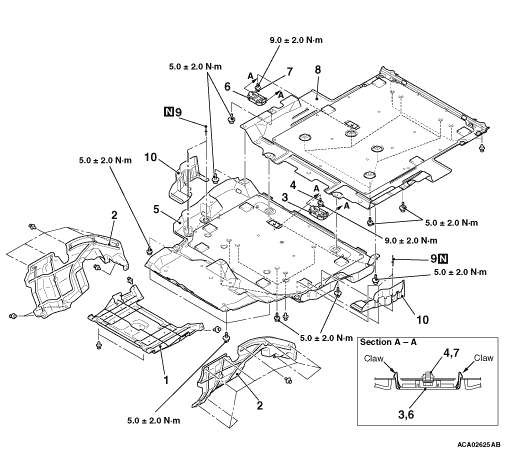
Pre-removal and post-installation operation
|

 |
|
DISASSEMBLY SERVICE POINT |
<<A>> RIVETS REMOVAL |
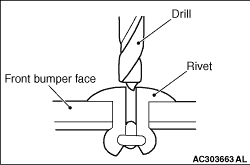 |
Use a drill (Φ 4.0 mm) to make a hole in the rivet to break it, and remove the
rivet. |
REASSEMBLY SERVICE POINT |
>>A<< RIVETS INSTALLATION |
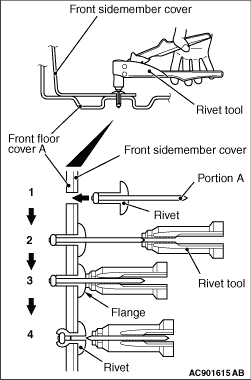 |
Use a rivet tool shown as in the illustration to connect the parts with rivets by the
following procedures: 1.Insert the rivet into a corresponding location. 2.Set the rivet tool at a portion A of rivet. 3.While pushing the flange surface of the rivet onto parts to be fixed with the rivet tool, press the handle of the tool. 4.Thin part of portion A of the rivet will be cut off and the parts is fixed in position. |