Code No. P1A08
Inhibitor sw: P
Code No. P1A09 Inhibitor sw: R
Code No. P1A0A Inhibitor sw:
N
Code No. P1A0B Inhibitor sw: D
Code No. P1A0C Inhibitor sw: E (JPN)/ B (EU)
Code
No. P1A0D Inhibitor sw: B (JPN)/ C (EU)
SHIFT POSITION SWITCH CIRCUIT


OPERATION
DIAGNOSIS CODE SET CONDITIONS
- If the P-position shift position switch (main) being ON
and all the shift position switch (sub) being OFF continue for 3 seconds or longer, the diagnosis
code No. P1A08 will be set.
- If the R-position shift position switch (main) being ON and all the shift position
switch (sub) being OFF continue for 3 seconds or longer, the diagnosis code No. P1A09 will be
set.
- If the N-position shift position switch (main) being ON and all the shift position
switch (sub) being OFF continue for 3 seconds or longer, the diagnosis code No. P1A0A will be
set.
- If the D-position shift position switch (main) being ON and all the shift position
switch (sub) being OFF continue for 3 seconds or longer, the diagnosis code No. P1A0B will be
set.
- If the B-position shift position switch (main) being ON and all the shift position
switch (sub) being OFF continue for 3 seconds or longer, the diagnosis code No. P1A0C will be
set.
- If the C-position shift position switch (main) being ON and all the shift position
switch (sub) being OFF continue for 3 seconds or longer, the diagnosis code No. P1A0D will be
set.
| note |
|
PROBABLE CAUSES
- Improper installation of the shift control cable
- Improper installation adjustment of the shift position switch (sub)
- Malfunction of the shift position switch (sub)
- Damaged wiring harness or connector(s)
- Malfunction of the EV-ECU
DIAGNOSIS PROCEDURE |
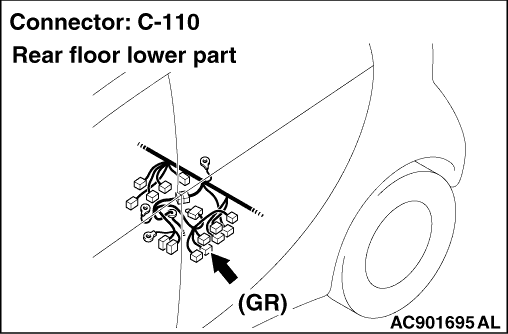
STEP 1. Connector check: E-02 shift position switch (sub) connector, C-110 EV-ECU connector |
Q.
Is the check result normal?
|
 Go to Step 2. Go to Step 2. |
|
 Repair the damaged connector. Repair the damaged connector. |
|
STEP 2. Check the wiring harness between C-110 EV-ECU connector terminal No. 81, 92 to 96 and E-02 shift position switch (sub) connector terminal No. 1 to 3, 5 to 7. |
| Check the signal lines for open circuit. |
Q.
Is the check result normal?
|
| Go to Step 3. |
|
| Repair the wiring harness. |
|
STEP 3. M.U.T.-III data list |
Check the shift position service data.(Refer to  .) .) |
|
Q.
Is the check result normal?
|
| Go to Step 4. |
|
| GROUP 22A - Shift Position Switch Adjustment (Refer to .) |
|
STEP 4. Shift position switch (sub) installation check |
| Using an adjustment plate for the shift position switch, check that the slit of the manual
control shaft aligns with the positioning groove of the shift position switch. (Refer to GROUP
22A - Shift Position Switch Adjustment .) |
Q.
Is the check result normal?
|
| Remove and install the transmission control cable (selector lever side). (Refer
to GROUP 22A - Transmission Control Removal and Installation .)
Then go to Step 5. |
|
| GROUP 22A - Shift Position Switch Adjustment (Refer to .)
Then go to Step 6. |
|
STEP 5. Shift position switch (sub) continuity check |
| GROUP 22A - Shift Position Switch Continuity Check (Refer to .) |
Q.
Is the check result normal?
|
| Go to Step 6. |
|
| Replace the shift position switch (sub). (Refer to GROUP 22A - Shift
Position Switch Removal and Installation .) |
|
STEP 6. Diagnosis code recheck |
| Check again if the diagnosis code is set to the EV-ECU. |
| (1)Erase the stored diagnosis code. |
| (2)Set the electric motor switch from the LOCK (OFF) position to the ON position. |
| (3)Check if the diagnosis code is set. |
Q.
Is the diagnosis code set?
|
| Replace the EV-ECU. (Refer to .) Then go to
Step 7. |
|
| The diagnosis is complete. |
|
STEP 7. Diagnosis code recheck |
| Check again if the diagnosis code is set to the EV-ECU. |
| (1)Erase the stored diagnosis code. |
| (2)Set the electric motor switch from the LOCK (OFF) position to the ON position. |
| (3)Check if the diagnosis code is set. |
Q.
Is the diagnosis code set?
|
| Return to Step 1. |
|
| The diagnosis is complete. |
|