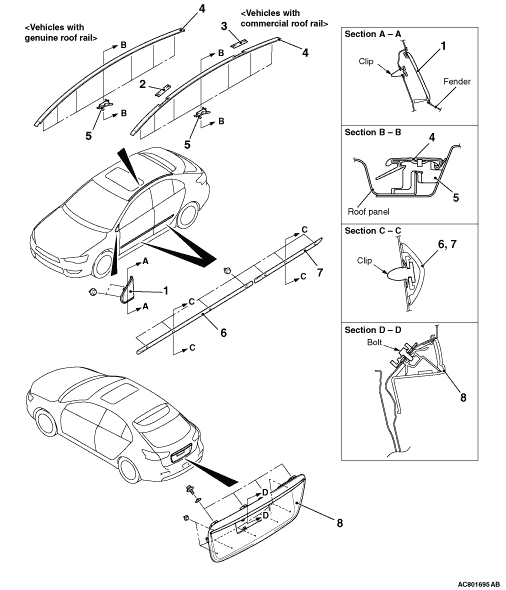
REMOVAL AND INSTALLATION


Front delta garnish removal
<<A>>

1.
Front delta garnish


Roof drip moulding removal steps


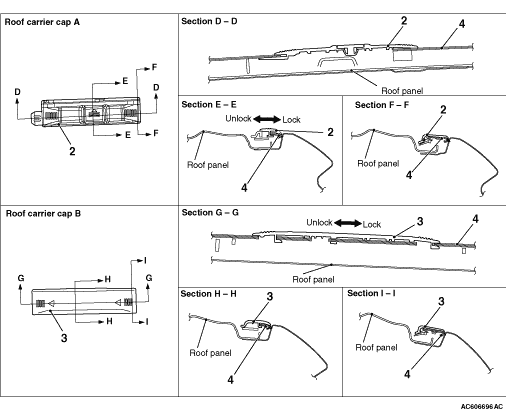
2.
Roof carrier cap A <Vehicles with commercial roof rail>


3.
Roof carrier cap B <Vehicles with commercial roof rail>
<<B>>
>>A<<
4.
Roof drip moulding
<<B>>
>>A<<
5.
Clip


Door protect moulding removal


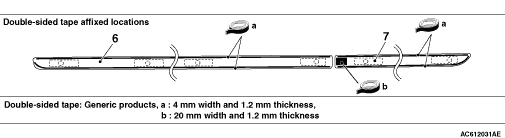
6.
Front door protect moulding


7.
Rear door protect moulding


Tailgate garnish removal steps


·
Tailgate trim (Refer to GROUP 52A, Tailgate Trim )


·
Tailgate lock release handle (Refer to GROUP 42A, Tailgate Handle and Latch )


8.
Tailgate garnish

REMOVAL SERVICE POINTS


<<A>> FRONT DELTA GARNISH REMOVAL


Use the special tool ornament remover (MB990784) to pry out the front delta garnish.


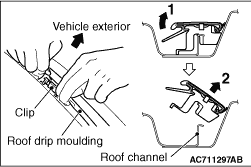
<<B>> ROOF DRIP MOULDING/ CLIP REMOVAL


caution Remove the roof drip moulding from front to rear or opposite direction in order.

1.Pull up the roof drip moulding inner side to remove the clips beneath it attached on the roof channel.
2.Rotate the roof drip moulding together with clips toward vehicle exterior and remove them from roof channel.

INSTALLATION SERVICE POINT


>>A<< CLIP/ ROOF DRIP MOULDING INSTALLATION


caution Install the roof drip moulding from front to rear or opposite direction in order.

1.Remove the clips from the roof drip moulding and attach them to the roof channel.

2.Engage the projected portion of the roof drip moulding to the 2 recessed portions of each clip.
3.Push down the roof drip moulding securely so that it is installed to the clips on the roof channel.