|
1.| caution |
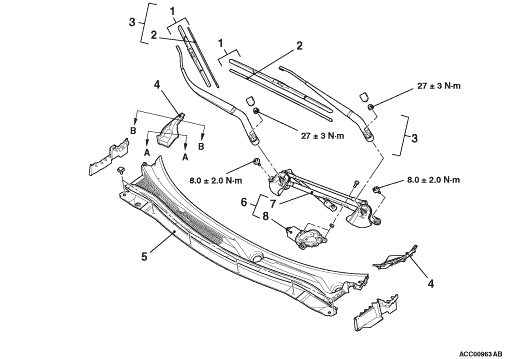
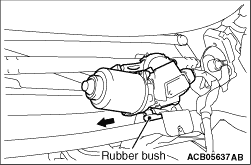
When pulling out the link assembly forward, be careful not to make a contact with the windshield glass.
|
Remove the rubber bushing of the windshield wiper link assembly in the direction of the arrow from the windshield wiper bracket.
|
|
|
1.Confirm that the wiper motor has set to automatic stop position (Refer to  ). ).
|
|
|
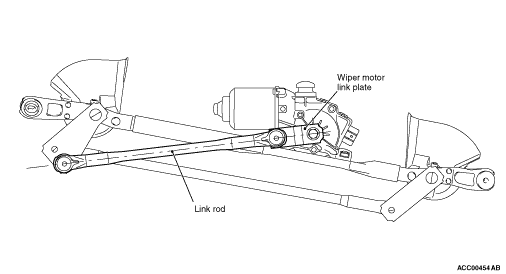
2.Set the wiper motor link plate onto the wiper motor shaft. When doing this, the wiper motor link plate and the wiper link rod should be in line as shown.
| note |
When the wiper motor link plate has slipped by even only one tooth on the wiper motor assembly, they cannot be in line.
|
|
|
|
3.Tighten the attaching nut of wiper motor link plate and wiper motor shaft. Use an appropriate tool to counter-hold the plate to prevent it from turning.
|
|
|
4.Apply grease to the inside of link rod joint (as required) and connect the link rod to wiper motor link plate.
|
|
|
Specified grease: Multipurpose grease SAE J310, NLGI No.2 or equivalent
|

|
5.Make sure that the rubber bushing of the windshield wiper linkage assembly is secured in the windshield wiper bracket.
|
|
|
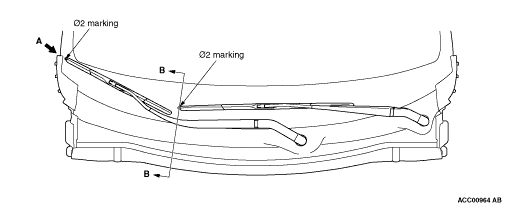
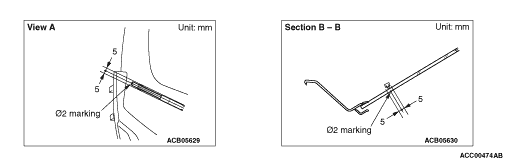
Install the wiper arm and blade assembly at the specified positions.
|
|
|
Standard value
(A): Φ 2 marking ± 5 mm
|
|
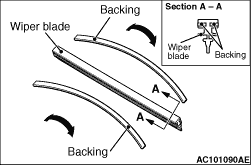
| caution |
Use a curved backing like that shown for the backing of a wiper blade to ensure sustained wiper wiping performance.
|
|