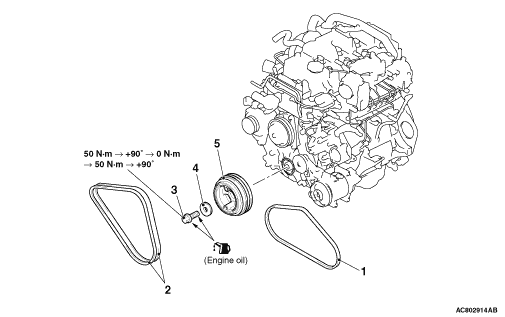
|
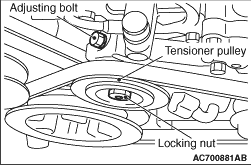
1.Loosen the locking nut of the tensioner pulley.
2.
| caution |
To reuse the drive belt, draw an arrow indicating the rotating
direction (clockwise) on the back of the belt using chalk, etc.
|
Rotate the adjusting bolt to the anti-clockwise direction (to the left), and remove the
drive belt.
|
|
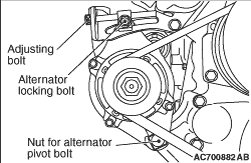
1.Loosen the nut for alternator pivot bolt and locking bolt.
2.
| caution |
To reuse the drive belt, draw an arrow indicating the rotating
direction (clockwise) on the back of the belt using chalk, etc.
|
Rotate the adjusting bolt to the anti-clockwise direction (to the left), and remove the
drive belt.
|
|
1.
| caution |
Use only the specified special tools, or a damaged pulley damper
could result.
|
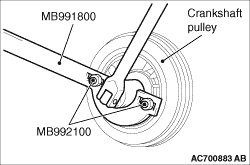
Use the following special tools to hold the crankshaft pulley.
- Pulley holder (MB991800)
- Crank pulley holder (MB992100)
2.Loosen the crankshaft pulley centre bolt and remove the crankshaft pulley washer and
crankshaft pulley.
|
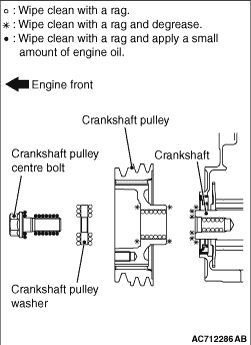
|
1.Wipe off the dirt on the crankshaft and the crankshaft pulley as shown in the figure using
a rag.
2.Wipe off the dirt on the crankshaft and crankshaft pulley as shown in the figure using
a rag, and then degrease the areas.
| note |
Degreasing is necessary to prevent decrease in the friction between contacting surfaces.
|
3.Install the crankshaft pulley.
4.Wipe off the dirt on the crankshaft pulley washer and the crankshaft pulley centre
bolt as shown in the figure using a rag.
5.Apply an appropriately small amount of oil to the threads and seating surface of the
crankshaft pulley centre bolt.
|
|
6.
| caution |
Use only the specified special tools, or a damaged pulley damper
could result.
|
Use the following special tools to stop the crankshaft pulley from turning in the same
way as was done during removal.
- Pulley holder (MB991800)
- Crank pulley holder (MB992100)
7.
| caution |
- When the tightening angle is smaller than
the specified tightening angle, the appropriate tightening capacity cannot be secured.
- When the tightening angle is larger than the specified tightening angle, remove
the bolt to start from the beginning again according to the procedure.
|
Tighten the crankshaft pulley centre bolt according to the procedure below.
(1)
Tighten the crankshaft pulley centre bolt to 50 N·m.
(2)
Tighten the crankshaft pulley centre bolt 90 degree angle.
(3)
Loosen the crankshaft pulley centre bolt fully.
(4)
Tighten the crankshaft pulley centre bolt to 50 N·m.
(5)
Tighten the crankshaft pulley centre bolt 90 degree angle.
|