
|
1.Cut the side outer panel as shown in the illustration to separate the weld points of the
front pillar reinforcement and side sill reinforcement at the side sill section.
|

|
2.After removing the front pillar, in order to remove the front pillar reinforcement remaining
on the body side, cut the side outer panel 120 mm above the cut area.
|

|
3.After removing the front pillar reinforcement, remove the front pillar inner upper remaining
on the body side.
|

|
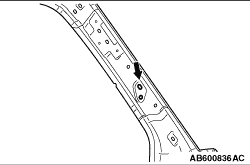
1.Align the front pillar inner upper and front pillar reinforcement, and open a hole from
the location shown in the front pillar reinforcement for filling sound dampening foam materials
between the front pillar reinforcement and side outer panel.
|

|
2.When assembling the new front pillar inner lower parts, apply in advance body sealant
to the areas shown in the figure of the instructions.
|

|
3.When assembling the new front pillar inner upper part, apply in advance adhesives to the
areas shown in the figure of the instructions.
Adhesive: Epoxyayresin adhesive
Brand: 3M ATD Part No.8115 or equivalent
|

|
4.When installing the new front pillar reinforcement, apply the body sealant in advance
to the areas shown in the figure. Also, to prevent the sound dampening foam materials to be filled
in the next process from dripping, machine the body loose panel cushion (MR484672) to adhere
it to the body side so that the front pillar inside is filled.
|

|
5.When installing the new front pillar outer, apply the body sealant and adhesives in advance
to the areas shown in the figure. Also, to prevent the sound dampening foam materials to be
filled in the next process from dripping, machine the body loose panel cushion (MR484672) to
adhere it to the body side so that the front pillar inside is filled.
Adhesive: Epoxyayresin adhesive
Brand: 3M ATD Part No.8115 or equivalent
|
|
6.Assemble the front outer pillar, then cover the hole and flange with bolt and aluminium
tape and fill the hole with sound dampening foam materials as shown in the figure of the instructions.
Sound dampening foam material:
3M ATD Part No.08463
|
|
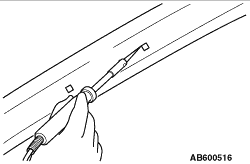
7.Wait 2 hours after filling the sound dampening foam material to remove the bolt and aluminium
tape, then melt the sound dampening foam material with a soldering gun so a clip, etc. can thoroughly
be inserted in the hole filled with sound dampening foam material.
|


 for the welding
point with front upper frame extension.
for the welding
point with front upper frame extension.