DOOR FIT ADJUSTMENT
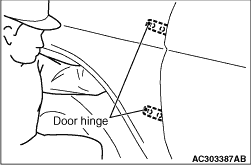 |
1.
(1) Apply protective tapes to the fender around the hinge installation position and door edge. (2) Remove the splash shield <Front door only> (Refer to  ). (3) Use special tool door hinge adjusting wrench (MB990900 or MB991164) to loosen the body-side door hinge mounting bolts (mounting nuts for the door upper hinge of the rear door only). (4) Move the door to adjust until the clearance around the door is even. |
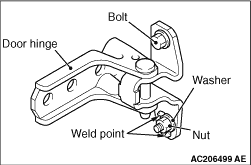 |
2.If a door is not flush with its surrounding panels, loosen the door-side door hinge
mounting bolt, nut and adjust the door as necessary.
|
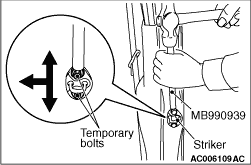 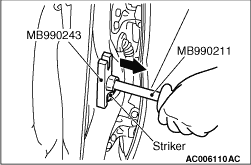 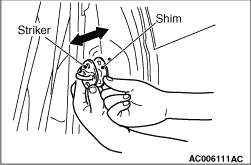 |
3.If the door is stiff to lock and unlock: (1) Adjustment by using the striker (vertically or toward the inside of the vehicle) Install a temporary bolt instead of the striker mounting bolt, and use the special tool remover bar (MB990939) and a hammer to tap the temporary bolt to the desired direction. (2) Adjustment by using the striker (toward the outside of the vehicle) Using the following special tools, pull the striker toward the outside of the vehicle to adjust.
Increase or decrease the number of shims so that the striker engages with the door latch properly. |