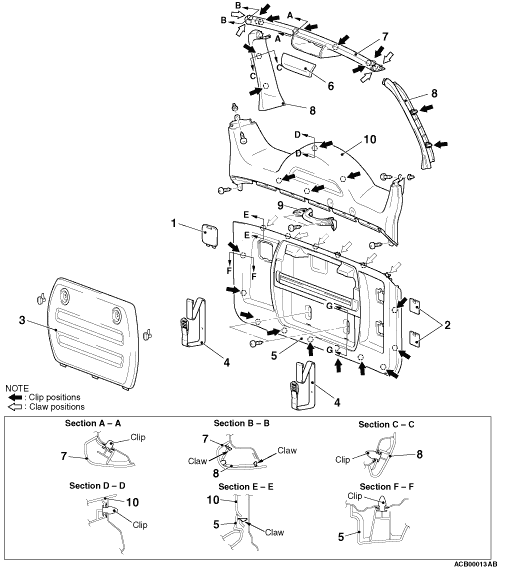
|
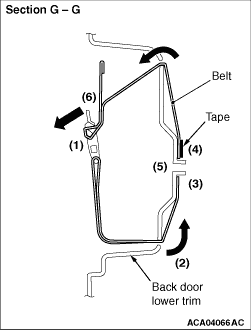
1.Install the belt with the front side of the buckle (the side without part number stamp)
facing toward the passenger compartment side.
2.Pass the belt through the hole on the lower side of the back door lower trim and then
through the hole on the upper side.
3.Hook the hole of the belt onto the boss for the back door lower trim mounting screw.
|
|
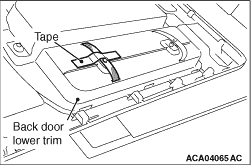
4.As shown in the figure, temporarily attach the belt using a tape (MS995049: Nitto Denko
No.712F or equivalent) to prevent the belt from being caught when installing the back door lower
trim.
| note |
Also, carry out this operation when removing or installing the trim for servicing inside
the back door.
|
5.Install the back door lower trim.
6.Pass the belt through the centre of the buckle and fold it back.
|