|
|
Q.
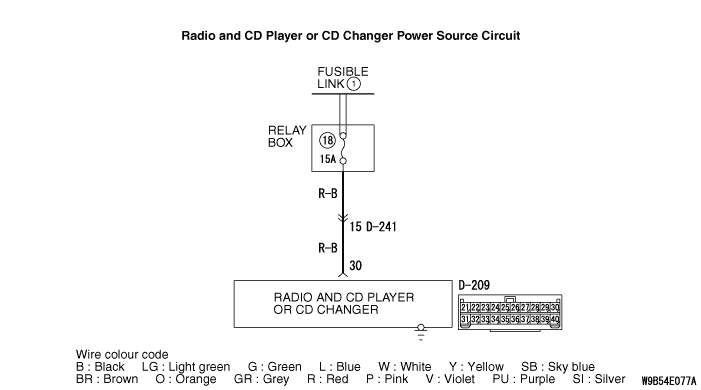
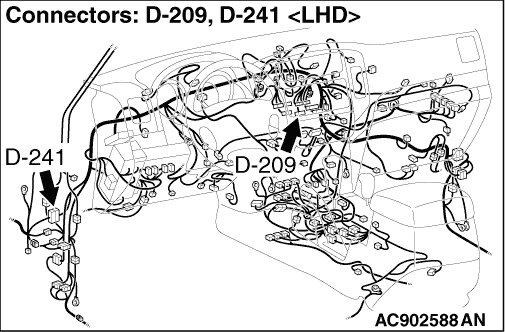
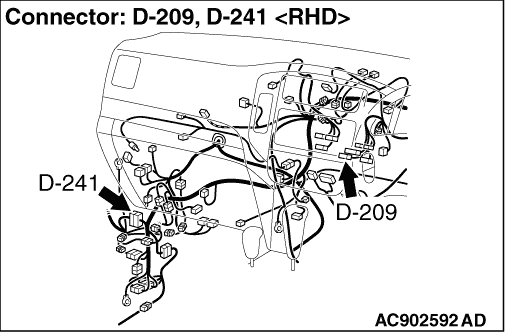
Is radio and CD player or CD changer connector D-209 in good condition?
|
|
|
 Repair or replace the component(s).
|
|
|
|
|
|
(1)Disconnect D-209 radio and CD player or CD changer connector, and measure at the
wiring harness side.
|
|
|
(2)Measure the voltage between terminal No.30 and body earth.
OK: System voltage
|
|
|
Q.
Is the check result normal?
|
|
|
- Check the power supply line for open circuit and short circuit.
|
|
|
Q.
Is the check result normal?
|
|
|
Repair or replace the damage component(s).
|
|
|
|
|
|
The radio and CD player or CD changer should be connected to the earth with an assembling
screw.
|
|
|
Q.
Is the check result normal?
|
|
|
Securely install and earth the radio and CD player or CD changer.
|
|
|
|
|
|
Check if the radio and CD player or CD changer memory backup power supply circuit is normal.
|
|
|
Q.
Is the check result normal?
|
|
|
 The trouble can be an intermittent malfunction (Refer to GROUP 00, How to use
Troubleshooting/inspection Service Points -
How to Cope with Intermittent
Malfunction  ).
|
|
|
|
|
|
Replace the radio and CD player or CD changer.
|
|
|
|