REMOVAL AND INSTALLATION
| danger | When servicing the high voltage system
components, always wear the specified protective clothes ad gloves, and shut off the high voltage
by removing the service plug (refer to GROUP 54D - Precautions for Handling High Voltage
Vehicles  ). ). |
| caution | As for the threaded fasteners indicated with *, tighten
temporarily first and then fully with the weight of motor (electric motor unit) as well as of
transmission assembly applied on the vehicle body. |
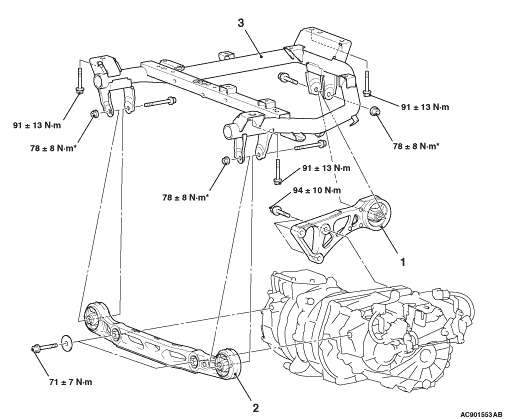 |
|
REMOVAL SERVICE POINTS |
<<A>> MOTOR MOUNTING REAR INSULATOR REMOVAL |
| 1.Support the motor (electric motor unit) & transmission assembly with the
transmission jack. |
| 2.Operate the transmission jack so that the weight of the motor (electronic motor unit) & transmission
assembly is not applied to the motor mounting rear insulator, and remove the motor mounting
rear insulator. |
<<B>> CONTROL HARNESS DISCONNECTION |
| Disengage the clip of the control harness mounted to the motor frame from the vehicle. |