
|
When removing the front pillar, since the side outer panel interferes with the cowl top
panel inner, cut and turn up the side outer panel as shown in the figure.
|

|
1.To reinforce the strength of the front pillar cut area, cut the side outer panel 100 mm
above the cut-out part and front pillar upper reinforcement 50 mm above the cut-out part.
|
|
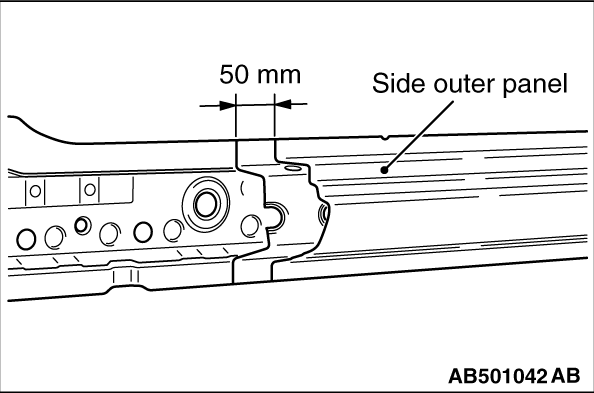
2.To reinforce the strength of the side sill cut area, cut the side outer panel 50 mm behind
the cut-out part.
3.Install the new front inner pillar lower parts.
|

|
4.Cut the new front pillar inner upper part by aligning it with the body-side and install
it.
|

|
5.Cut the new front pillar reinforcement upper part by aligning it with the body-side and
install it.
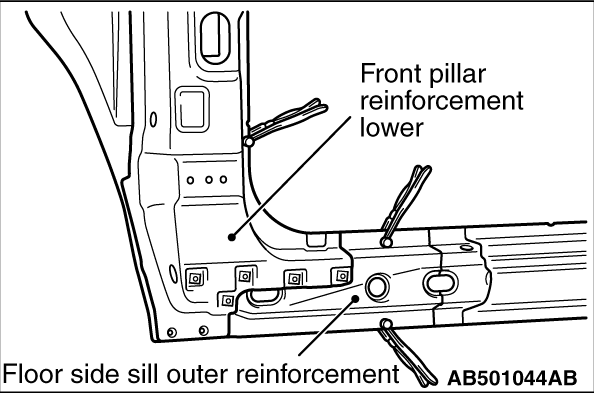
6.Cut the new floor side sill outer reinforcement parts by aligning it with the body-side.
|
|
7.
| caution |
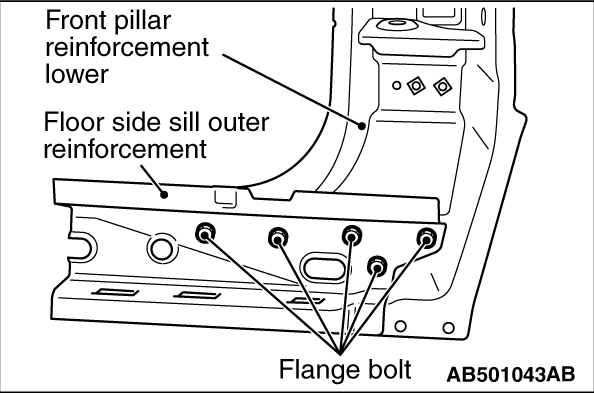
To improve accuracy of assembling the new front pillar reinforcement lower parts and new
floor side sill outer reinforcement part, temporarily assemble them on the body, align with
the body, and then temporarily weld and assemble the new parts. After assembling, remove it
from the body.
|
Tighten the temporarily-welded front pillar reinforcement lower parts and floor side sill
outer reinforcement part with flange bolts.
Flange bolts tightening torque: 24 ± 4 N·m
|
|
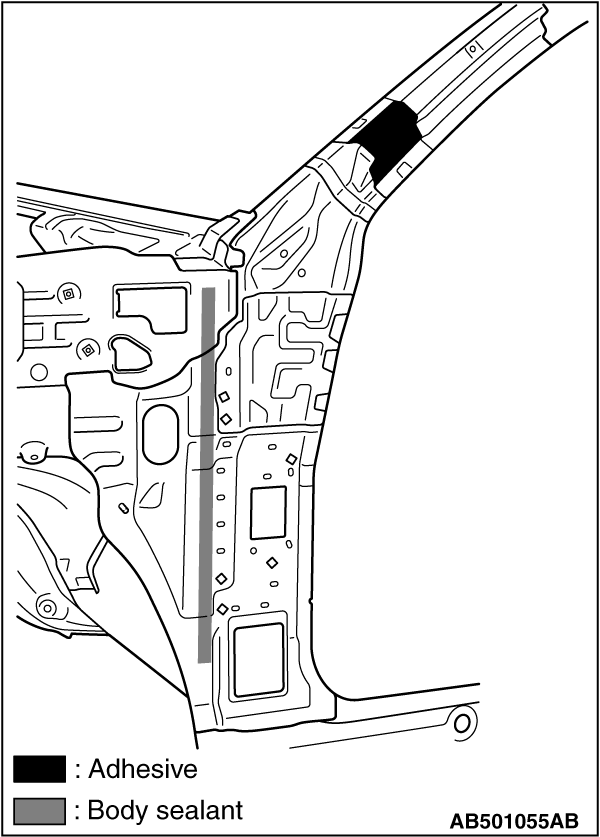
8.When installing the assembled front pillar reinforcement lower and floor side sill outer
reinforcement, apply adhesive and body sealant on the body as shown in the figure.
Adhesive: Epoxyayresin adhesive
Brand: 3M ATD Part No.8115 or equivalent
|
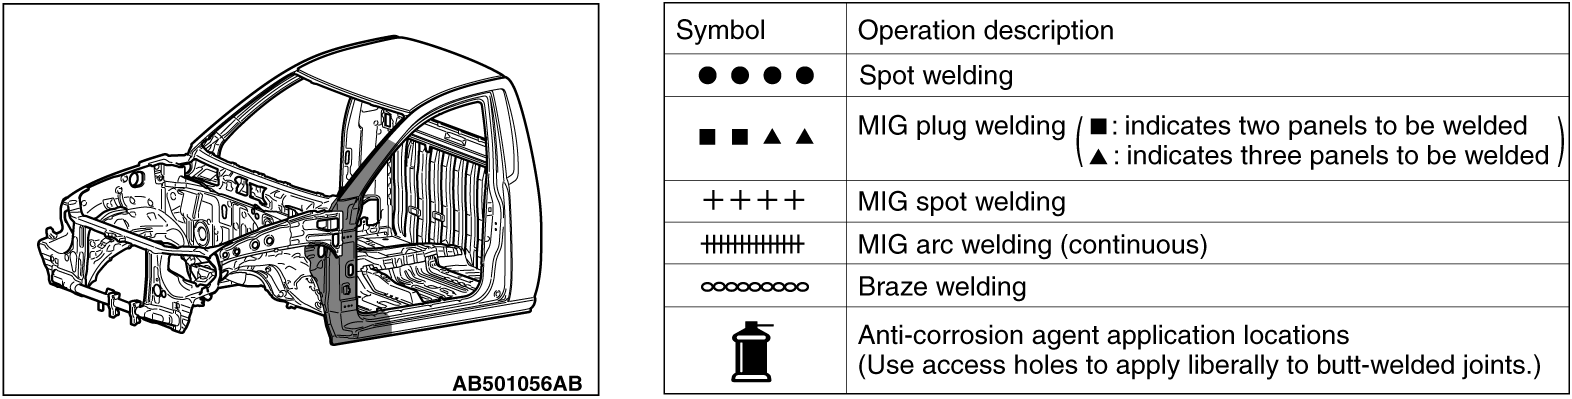
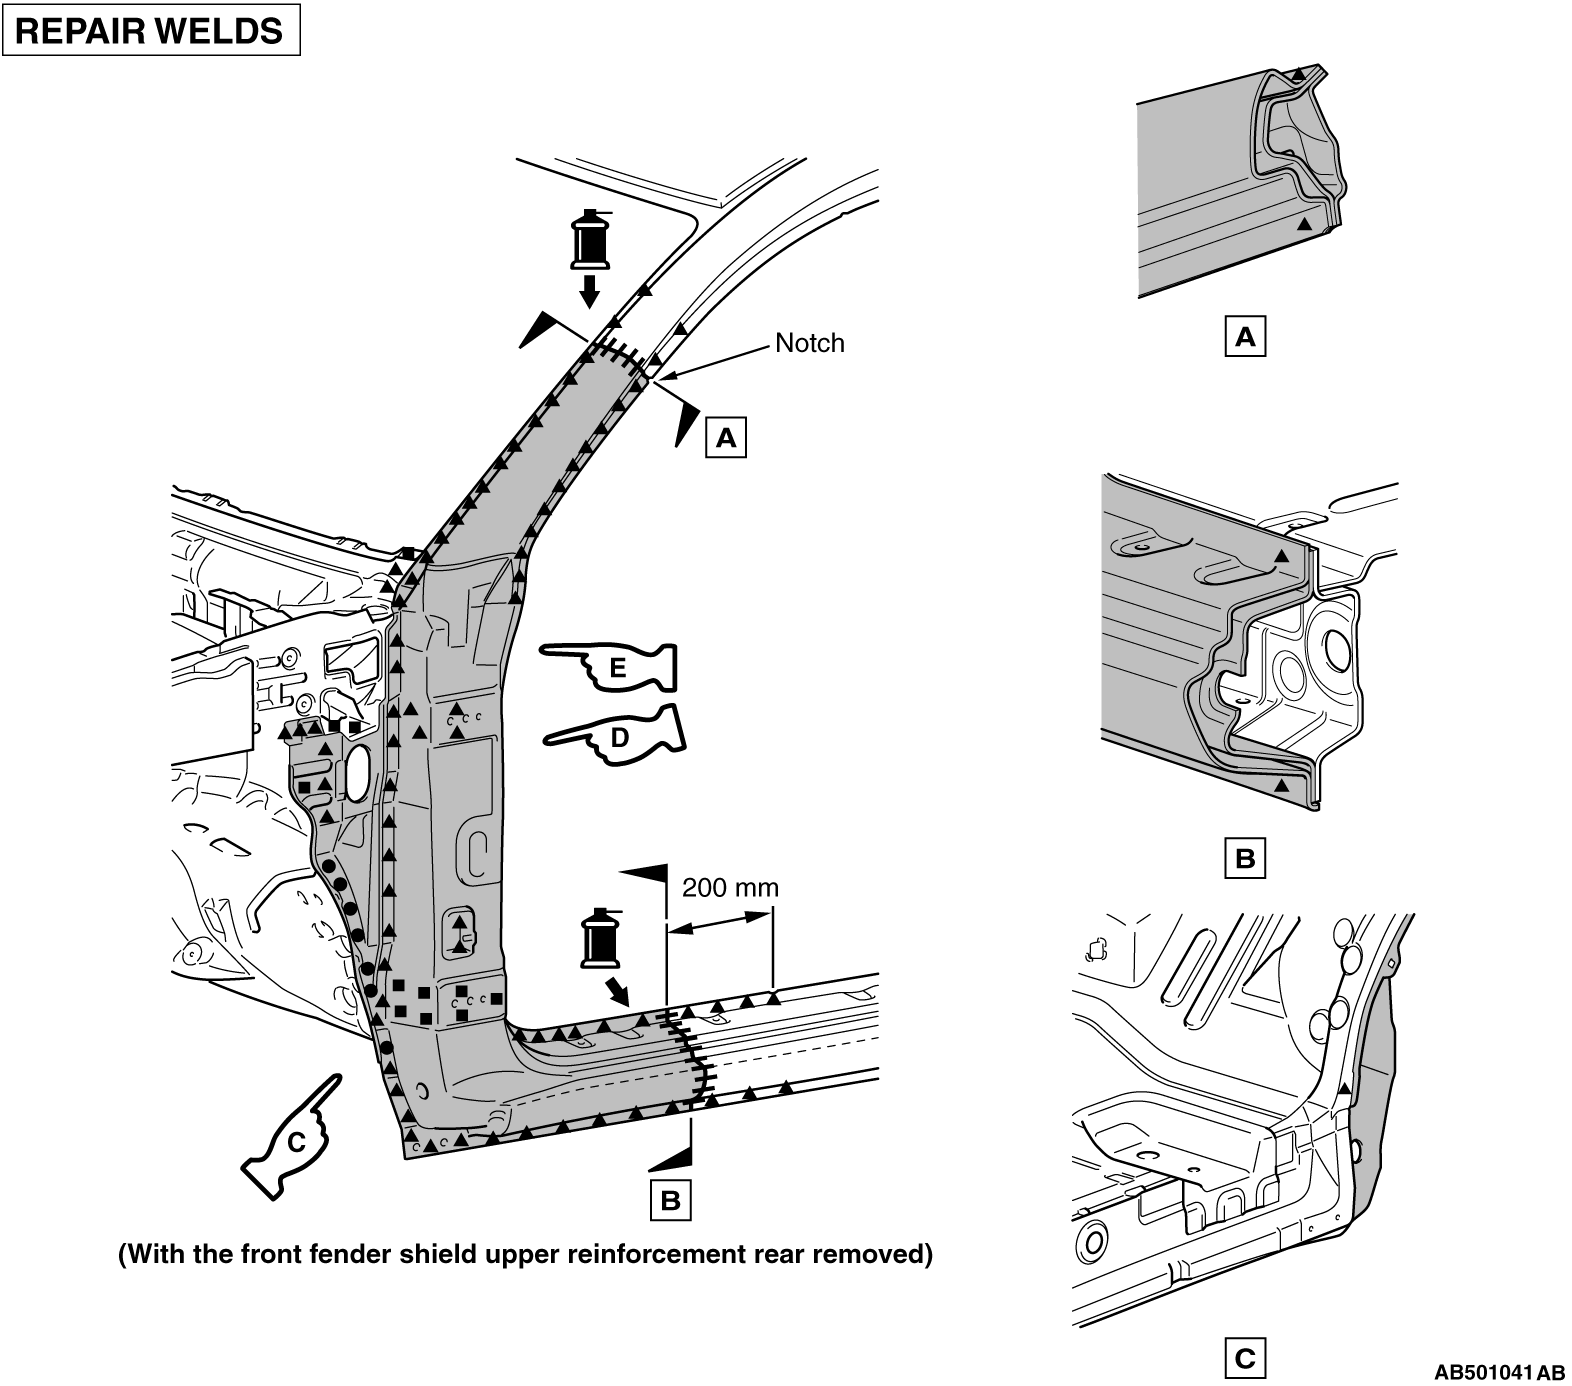
 for the welding
point with front fender shield upper reinforcement rear.
for the welding
point with front fender shield upper reinforcement rear.