|
|
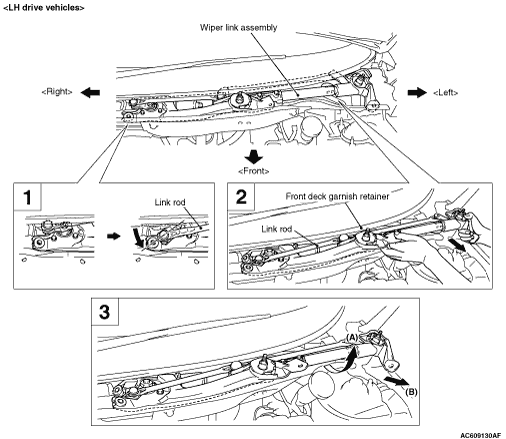
1.Manually turn the link rod at the right of the wiper link assembly forward to the position indicated in the figure.
|
|
|
2.Pull out the attachment section of the left side of link assembly forward until the link rod bumps against the front deck garnish retainer.
|
|
|
3.While turning the link assembly upward (A), pull out the entire link assembly diagonally forward left (B).
|
|
|
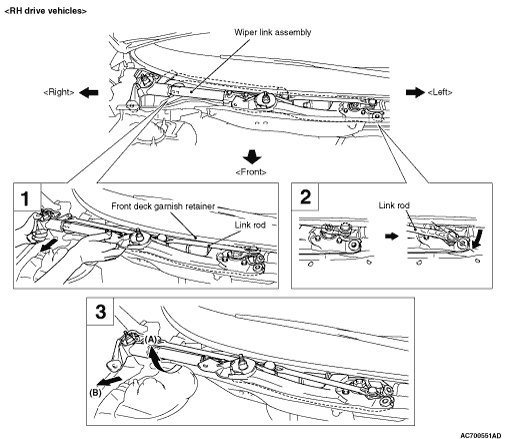
1.Pull out the attachment section of the right side of link assembly forward until the link rod bumps against the front deck garnish retainer.
|
|
|
2.Manually turn the link rod at the left of the wiper link assembly forward to the position indicated in the figure.
|
|
|
3.While turning the link assembly upward (A), pull out the entire link assembly diagonally forward right (B).
|
|
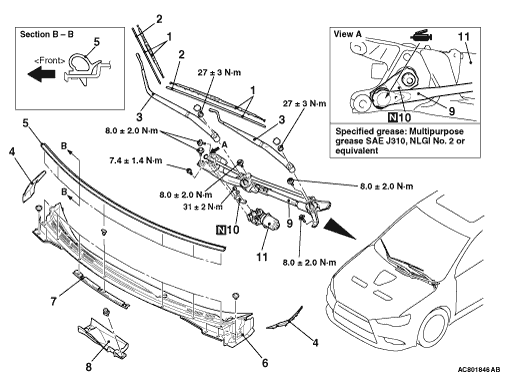
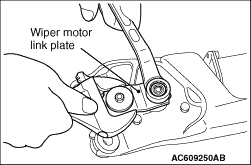
1.To disconnect the wiper motor link plate from the wiper motor shaft, use an appropriate tool to counter-hold the plate to prevent it from turning.
2.Remove the wiper motor from the wiper link assembly.
|
|
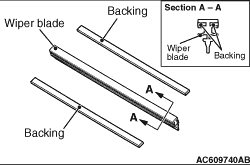
| caution |
For good windshield wiper wiping performance, use windshield wipers without a curve in the backing of the wiper blade.
|
|
|
|
1.Confirm that the wiper motor has set to automatic stop position (Refer to  ). ).
|
|
2.
| caution |
Always replace the wiper motor link plate with new one.
|
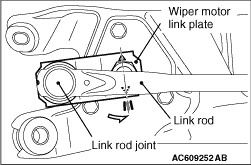
Set the wiper motor link plate onto the wiper motor shaft; aligning the triangle mark on the plate to the centre line (of 3 lines) on the wiper link assembly as shown in the illustration.
3.Tighten the attaching nut of wiper motor link plate and wiper motor shaft. Use an appropriate tool to counter-hold the plate to prevent it from turning.
4.Apply grease to the inside of link rod joint (as required) and connect the link rod to wiper motor link plate.
Specified grease: Multipurpose grease SAE J310, NLGI No.2 or equivalent
|
|
|
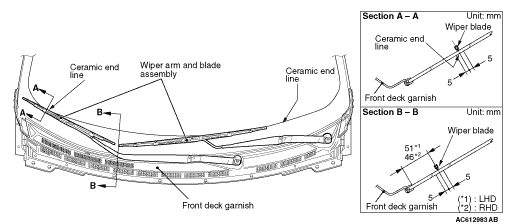
Set the wiper arm and blade assembly at the specified positions.
|
|
|
A(Passenger’s side): Ceramic end line ± 5.0 mm
B(Driver’s side): Front deck garnish end
51± 5 mm (LHD)
46± 5 mm (RHD)
|