|
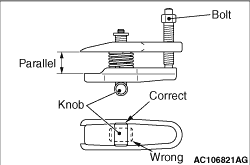
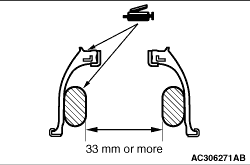
1.Install special tool ball joint remover (MB991897 or MB992011) as shown in the figure.
|
|
2.Turn the bolt and knob as necessary to make the jaws of special tool parallel, tighten
the bolt by hand and confirm that the jaws are still parallel.
| note |
When adjusting the jaws in parallel, make sure the knob is in the position shown in the figure.
|
3.Tighten the bolt with a wrench to disconnect the ball joint.
|
|
|
If the upper arm ball joint is disengaged from the knuckle, always renew the upper arm
ball joint dust cover and retainer by following the procedure below.
|
|
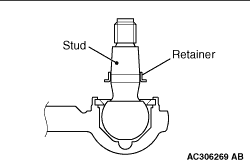
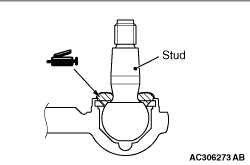
2.
| caution |
Be careful not to damage the ball joint stud.
|
Use a flat-tipped screwdriver to remove the retainer.
|
|
3.Apply multi-purpose grease evenly around the ball joint stud.
Amount to use: 7.5 g or more
|

|
4.Apply multi-purpose grease to the new retainer, and assemble it to the new dust cover.
|
|
5.
| caution |
Total grease amount (grease amount used in step 3 and this step) should be
22 ± 1 g.
|
Fill multi-purpose grease inside the dust cover as shown.
6.Apply multi-purpose grease to the dust cover lip.
7.Tape the stud threads to avoid damage.
|
|
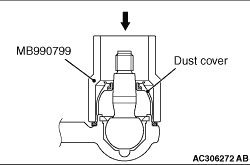
8.
| caution |
Ensure grease does not come into contact with the ball joint threads and tapers.
Wipe off the grease if contaminated.
|
Use special tool boll joint dust cover installer (MB990799) to drive the dust cover into
the position shown.
9.Secure the dust cover with the clip ring.
10.Engage the upper arm ball joint with the knuckle.
| note |
The retainer is secured in a predetermined position by tightening the ball joint nut to
the specified torque.
|
|